Want more leads? Of course you do! Everybody needs to receive inquiries from prospects and customers, whether you are a large business or a small nonprofit.
When you are first implementing Salesforce, one of the decisions you’ll need to make is how to efficiently get inquiries from your website into Salesforce, so communications can quickly be managed in your CRM. Same for when you are redesigning your website, or trying to figure out how to make your Contact Us page or advertising landing page more compelling to prospective customers.
Salesforce uses Leads as the record to separate prospects interested in your product or service from your customers. In the Salesforce data model, once Leads are qualified, you convert them to an Account with a Contact, and optionally an Opportunity.
One of the easiest ways to get these inquiries into your Salesforce account is a feature called Web-to-Lead (sometimes abbreviated W2L). And the good news is that this technology is already included in your Salesforce Sales Cloud or Service Cloud subscription.
In this ultimate guide to Salesforce web-to-lead forms, we will cover the following:
- What is Salesforce Web-to-Lead?
- Advantages of Salesforce Web-to-Lead Forms
- Disadvantages of Salesforce Web-to-Lead Forms
- Preparing Your Web to Lead Configuration
- How to Set Up Salesforce Web-to-Lead
- Understanding Web-to-Lead Form Code
- Implementing Web-to-Lead Forms on Your Website
- Working with Salesforce Leads
- Adding Data to Your Salesforce Leads
- Next Steps for Managing Salesforce Leads
What is Salesforce Web-to-Lead?
Salesforce web-to-lead is an included feature in Salesforce Sales Cloud. By turning it on and going through the steps below, you can quickly generate a form to place on your website, where customers or prospects who fill out the form instantly appear in Salesforce as leads.
By having leads automatically created in Salesforce, instead of sent via email or stored elsewhere, you can get better data on your prospects — who they are, where they came from, and more.
Web-to-Lead ensures no data is lost, you get better reporting on lead flow, and no manual data entry is required of your sales people. It also enables you to easily kick off automations in Salesforce, such as email autoresponders, automated lead assignment to Salesforce users or queues, and more.
Web-to-Lead is one of the first steps to generating leads, and managing them in Salesforce!
Advantages of Salesforce Web-to-Lead Forms
There are many advantages to using Salesforce Web-to-Lead Forms, as it is the included technology that has been provided as part of Salesforce for more than 20 years.
- Native Integration: Salesforce web-to-lead forms are directly integrated into Salesforce, so you don’t need third-party form apps or connectors. This often simplifies your go live process, and reduces potential points of failure.
- Data Consistency: Since Salesforce web-to-lead forms are part of the Salesforce product, data captured through these forms is immediately available within Salesforce. This can eliminate the need for manual data entry or syncing, and any new fields or other changes to your Salesforce config are immediately available.
- Security: With Salesforce web-to-lead forms, data is transmitted securely from your website to your Salesforce environment, reducing the risk of data breaches or security vulnerabilities that could be associated with third-party integrations.
- Built for Salesforce: Since Salesforce web-to-lead forms are a longstanding feature of the Salesforce environment, you know they will work with other Salesforce tools and customization options, such as Auto-Responders and Lead Assignment. You can also count on many third-party apps on the Salesforce AppExchange being designed to support Web-to-Lead forms.
- Cost: Salesforce web-to-lead forms are included as a feature with all Salesforce subscription levels, so there is no additional cost. This can be helpful for small businesses or organizations with limited budgets.
Disadvantages of Salesforce Web-to-Lead Forms
We’ve seen some of the advantages of Salesforce web-to-lead above. So why are there so many dozens of form applications out there, offering alternatives to a feature that is included with Salesforce? Here are some of the disadvantages of Web-to-Lead, and why customers might turn to third-party forms like Formstack or FormAssembly.
- Fewer Advanced Features: Third-party form solutions often offer a wider range of features and customization options compared to Salesforce web-to-lead forms. This can include advanced form validation, conditional logic, multi-page forms, file or attachment uploads, and integration with other third-party services.
- Ease of Use: Some third-party form solutions are more user-friendly and easier to set up compared to Salesforce web-to-lead forms, especially for organizations who may not have a web developer to add formatting and validation code to the raw HTML forms that Salesforce provides.
- Customization and Branding: Third-party forms usually provide more options for customizing the look and feel of your forms to match your brand identity. This can include custom CSS styling, branded URLs, and customizable form templates, as well as the ability to publish an updated version to your website without involving your web developer.
- Deduplication. Salesforce web-to-lead forms cannot match submissions to existing Salesforce records to prevent duplicates, unlike some forms (Marketing Cloud Account Engagement forms, for example, use cookies to match submissions to existing prospects). Leads can be deduped using Salesforce’s duplicate rules or a wide variety of other apps however.
- Limits. With Salesforce web-to-lead forms, you can capture up to 500 leads in a 24-hour period, before additional requests get queued. While this is not an issue for most organizations, it could make web-to-lead ill suited for large companies. And though Salesforce provides support for web-to-lead functionality, they do not support customizations to the code unique to your implementation.
Preparing Your Web to Lead Configuration
There are a few things to consider, when preparing to set up Salesforce web-to-lead. These items can always be updated after implementation, but thinking them through ahead of time will make your go live process smoother.
Lead Ownership and Assignment
Who will own new leads, and how will they be assigned?
This may be simple if you only have a single person responding to inquiries, but for larger sales organizations there are a number of Salesforce features that can make lead follow up more efficient and organized.
Leads can be automatically assigned to Salesforce users based on various rules and the data submitted via the form, or assigned to a Queue for distribution.
In addition, there is a “Default Lead Creator” setting in Salesforce, where all leads that come in via Web-to-Lead forms will show up as having been created by that person. There is also a default Lead Owner setting, so if you do not set up lead assignment rules, all web-created leads will be assigned to the default owner.

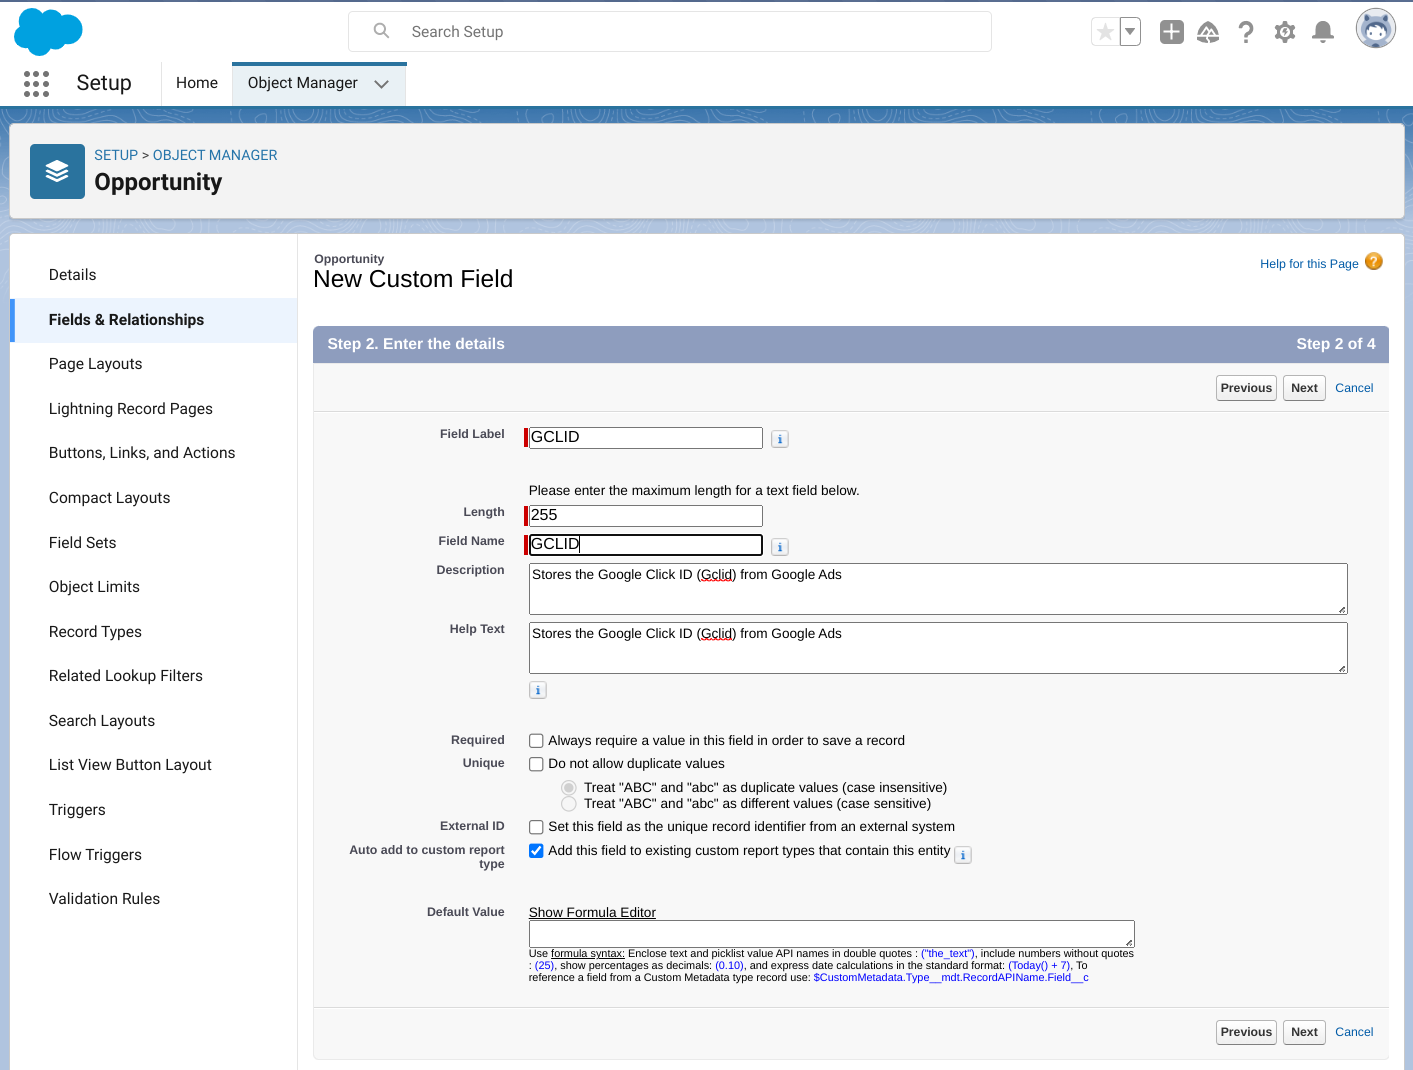
Lead Form Custom Fields
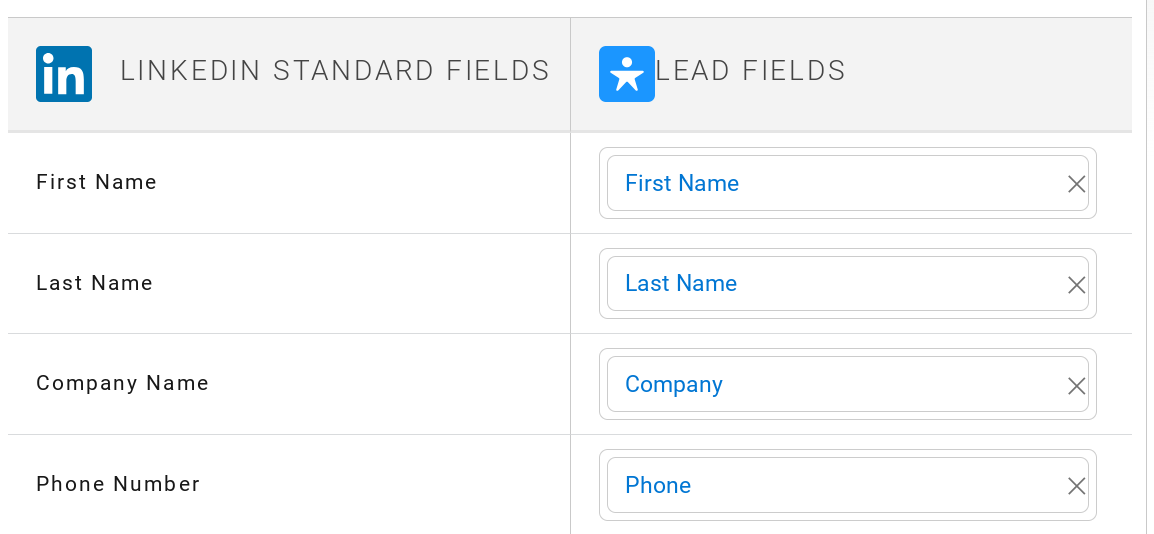
Most lead forms are kept simple and short, using existing fields already provided by Salesforce. First Name, Last Name, Company, Email, etc.
But if you would like to track information specific to your business, it is easy to create custom fields in Salesforce. Perhaps you would like to add a picklist field for your leads to select which of your products or services a lead is inquiring about, or add fields for a lead to request a quote.
Creating custom fields ahead of time will make them available when you create your web-to-lead form, as well as improve the data you receive in Salesforce. You can also use information specific to your business to help drive lead assignment or auto-responses, based on product interest or different sales teams.
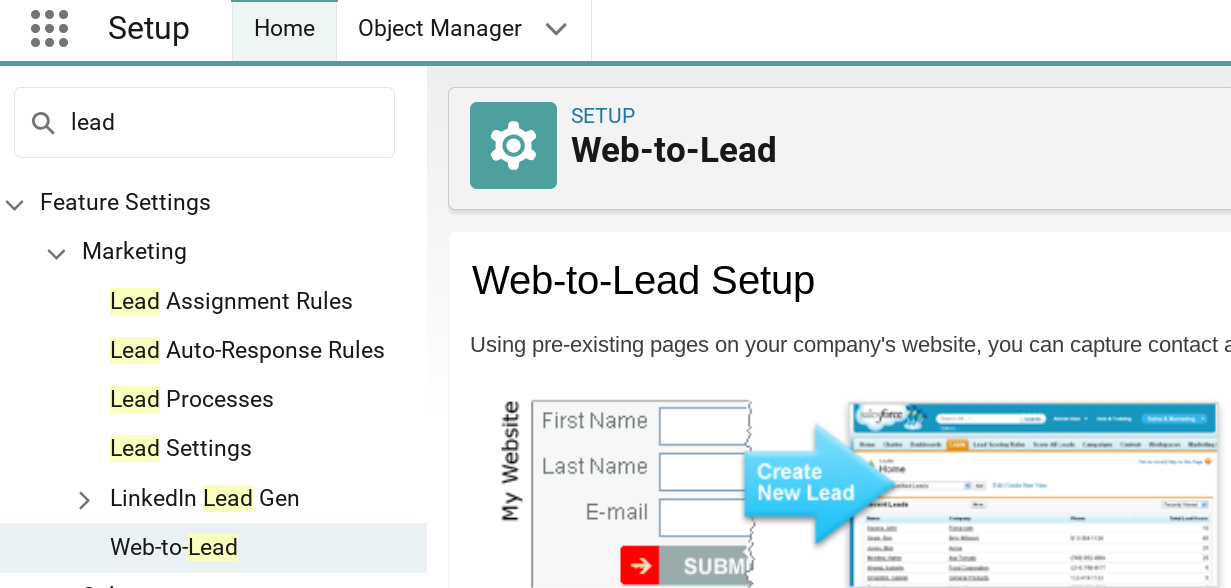
How to Set Up Salesforce Web-to-Lead
You can create Salesforce web-to-lead forms in just a few simple steps. First you will enable the basic feature and choose its default settings, and second you will create a form.
Enabling Salesforce Web-to-Lead
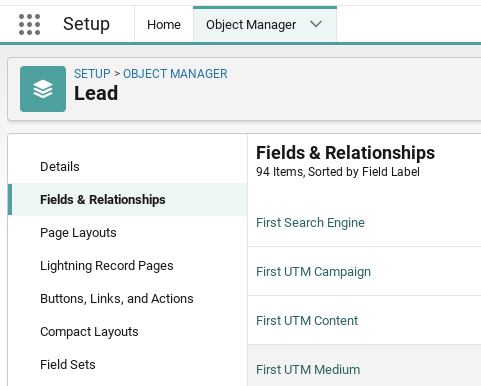
- Click the Setup gear menu, and search for web-to-lead, then select it.
- To enable the feature or update settings, click Edit
- Optional settings:
- Select Require reCAPTCHA Verification to reduce spam leads
- Specify a Default Lead Creator. This user is shown as the Creator for all leads submitted through your website,, and should ideally have Administrative permissions to Salesforce.
- Select a Default Response Template if you want to automate email responses to your leads. You will need an active Email Template. Additional replies based on the information a lead enters in the form can drive different responses using auto-response rules, but this sets the default.
- Click Save

Creating a Salesforce Web-to-Lead Form
- To create a new form, click Create Web-to-Lead Form
- Choose the fields you wish to include in your form.
- Use the arrows to move fields from Available Fields to Selected Fields lists
- Use the up down arrows to select the order of the fields on your form
- Enter the URL to direct prospects to after they submit your form (commonly a thank you page).
- Click Generate
- Copy the code created and save to a document and/or email to your web developer
- Click Finished

Salesforce Documentation Links
Guidelines for Setting Up Web-to-Lead
Generate Leads from Your Website for Your Sales Teams
Understanding Web-to-Lead Form Code
There are a few parts of the web-to-lead code you might wish to understand as a marketer, but certainly should as a web developer.
Feel free to skip this section if the underlying code is not of interest!
To create additional web-to-lead forms, you can generate them using the same process above, or simply copy and edit the code as needed to remove or add fields. If you are going to do the latter, you should understand the following pieces of code:
- Form Action
- Salesforce Org ID (Oid)
- Thank you page
- Submit

Form Action
The first line in your Salesforce web-to-lead form tells Salesforce to post the data to a Salesforce endpoint.
<form action="https://webto.salesforce.com/servlet/servlet.WebToLead?encoding=UTF-8" method="POST">
This should always be the same (unless you are using Marketing Cloud Account Engagement (fka Pardot), in which case you might update it with a Pardot Form handler URL in cases where you wanted Leads to first go into Pardot).
Salesforce Org ID (oid)
The second line in your form is the oid, or Salesforce Organization ID. This defines the target Salesforce account where leads should be posted to, so it is very important.
<input type="hidden" name="oid" value="00Dd0000000fbft">
This value should not be changed, unless you wanted to create a test form that posted to a different Salesforce org, such as a Developer org or Sandbox org for testing. In that case, you could change the value to the 15 character org ID of the new target Salesforce account.
Thank you page (retURL)
The retURL is where you want website visitors to end up after submitting the form. Simply update the value to direct people to a different page.
<input type="hidden" name="retURL" value="http://www.cloudamp.com/contact/thanks.html">
While some companies redirect to their home page after form submission, using a dedicated thank you page is a best practice. That allows you to have a thank you message indicating next steps, as well as hidden conversion tracking codes for Google Ads or other online advertising, since visitors should only be arriving at this thank you page after a conversion (submitting the form).

Submit
The final input is a submit button, which is what website visitors click on to submit the form. You can change the value here as well to a more compelling message, such as “Get Started” or “Download Now” etc.
<input type="submit" name="submit" value="Get Started">
This input will almost certainly be styled by your web developer to match your site, which is what we cover in the next section!
Implementing Web-to-Lead Forms on Your Website
Once you have generated the Salesforce web-to-lead code, there are two basic steps to implementing them on your website:
Formatting Your Salesforce Web-to-Lead Forms
There are two missing pieces in the web-to-lead code provided by Salesforce:
- Formatting / styling the form (required)
- Adding data validation (optional)
Formatting the layout of the form on your web page is needed because the HTML code generated by Salesforce does not include any styling, so the fields don’t align properly, looking a bit jumbled. So some CSS code is definitely required to make it look decent.
Web Developer / Webmaster
If you have a web developer that you work with, it should be a relatively small project for them to format the form for your website. Send them the HTML code that Salesforce generated, and they can add some brand colors and fonts to the form title and submit button, and arrange the form fields so it looks more professional.
On the data validation side, it is not required, but some organizations will want to add validation to the form. Common use cases are requiring a properly formatted email address or requiring that certain fields be filled out to submit the form. Your web developer should be able to add some basic javascript validation to the form, though this is not necessary for most lead generation activities in our opinion.
ChatGPT
While AI has its limitations, you can cut and paste the form code into ChatGPT and ask it to format things in different ways. It is very capable of adding some basic CSS width and alignment parameters and javascript validation quite quickly.
One current limitation of ChatGPT is that as a text-based AI model, it will not render (display the output) of the HTML code it generates. So you will need to take its output and load it separately in a browser to see how much it has improved things.

Testing Your Salesforce Web-to-Lead Forms
Testing your Salesforce Web-to-Lead forms is one of the most important steps, and is recommended for every single form you implement (as well as any time you make a change to a form!)
After all, if your forms are not working properly, you can lose a large volume of potential business. And worst of all, you may not know anything is wrong right away, as form submits on a broken form may just not work, with nothing coming into Salesforce and no errors apparent to you or the prospect.
So testing is absolutely critical, to avoid lost business and unhappy prospects wondering why they never heard from you.
The good news is that testing your web forms is easy, and tools are already built in. There are two basic ways to test your form:
| 👍 Protip:
If this is your first time implementing web-to-lead, we recommend creating a test page for your form, which is not linked to the rest of your web site. That way customers won’t stumble across it during your testing, and you won’t cause any disruption to your contact us or other important forms until you are tested and ready to go live. |
Web-to-Lead Debug Mode
When you generate the HTML code from Salesforce, you may notice a section at the top for debugging:
<!--  ----------------------------------------------------------------------  -->
<!--  NOTE: These fields are optional debugging elements. Please uncomment    -->
<!--  these lines if you wish to test in debug mode.                          -->
<!--  <input type="hidden" name="debug" value=1>                              -->
<!--  <input type="hidden" name="debugEmail"                                  -->
<!--  value="<<add emailId here>>">                                           -->
<!--  ----------------------------------------------------------------------  -->
This code will allow you to have the form submissions emailed to you as a test, instead of going into your Salesforce org. So it is very useful when you are first testing Salesforce web-to-lead.
To test using debug mode:
- Remove the <!– and –> from the beginning and end of the 3 lines of your code (starting with the <input… line). This “uncomments” the code, allowing it to run on your website.
- Replace <<add emailId here>> with your email address.
Now when you submit the form, it will send you an email with the output, instead of creating a lead in Salesforce.
Once you have tested your form, you should remove these lines, or re-comment them and delete your email address, prior to going live.
Live Form Testing
Testing your forms outside of debug mode is the most important test. That way you can ensure leads are correctly making it into your Salesforce org, as well as confirm that any lead assignment rules or auto-responses are working as expected.
When submitting test leads, here are a few recommendations:
- Clearly label the leads by putting things like TEST-IGNORE as a name or company, so internal users know they are tests
- Use unique email addresses, to avoid any issues with duplicate blocking (see protip ⇩)
- Fill out all fields, to be able to check that all fields are passing to Salesforce
- Make sure any picklist fields values are mapping correctly
| 👍 Protip:
If you are using Gmail or Google Suite for your email, you can create unique email addresses that still go to your inbox by adding a + and additional text between your name and the @ sign. Google ignores anything between the + and @, so you can create unlimited unique emails for testing in the format bob+test123@test.com |
Once you have submitted a few test leads on any new or updated form, simply navigate to the Leads tab in Salesforce and review the records. Ensure that all the data being collected on the form made it successfully into Salesforce, and that any ownership changes and automations happened as expected.
You are now ready to go live with your Salesforce web-to-lead forms!
Working with Salesforce Leads
Now that your forms are live, there are a few things to keep in mind around using Leads in Salesforce. Here are some frequently asked questions around Salesforce Leads to get us started:
Can I have multiple lead forms on different web pages?
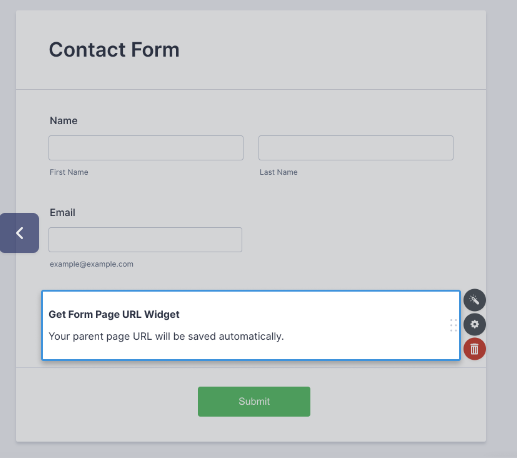
Yes, you can put the Salesforce web-to-lead code on as many pages of your site as you would like. You can also create shorter forms for advertising landing pages by removing certain fields from the HTML code, or longer forms by adding custom fields such as for a request a quote form.
How can I see which leads are coming from the web?
All web generated leads will show up as created by the default web-to-lead user that you set. You can also set certain lead sources in the form code, or automatically add leads to a certain campaign (see our protip above). But by default there is no unique source or indication of web generated leads.
How do I know which leads are new?
When a lead is assigned, it is marked as “Unread” until its owner views it. So there will be a check mark on the Unread column on lead list views.
Who owns new leads from my website?
Your Salesforce administrator can set up lead assignment rules, to automatically route new web form leads to different users, or queues where they can be manually assigned from. If you do not set up lead assignment rules, or none of the criteria match to assign a lead, the lead will be owned by the Default Lead Owner in the lead settings.
What is the status of new leads from my website?
All new leads from your web-to-lead forms will have the status equal to the “default status” that is defined by your Salesforce administrator in the Lead Status picklist values. The standard default status that Salesforce comes with is usually “Open.” Most organizations will want to customize the lead status picklist values to match their lead qualification follow up process.
Adding Data to Your Salesforce Leads
In the last section of our ultimate guide to Salesforce web-to-lead forms, we’ll explore some of the ways you can add marketing, sales and demographic data to your Salesforce leads.
Data enhancements include the following options:
- Lead Source
- Self-Reported Data
- Third Party Tracking Apps
- Data Enrichment Services
Lead Source
The Lead Source field in Salesforce is populated by some integrations with Salesforce. You can also hard code this value in a hidden field in your forms, if you want:
<input type="hidden" id="lead_source" name="lead_source" value="Whitepaper Download Page">
By adding this hidden field above, the Lead Source will effectively show you the form source, eg. what page the lead was on when they submitted the form. So it is slightly different from a Lead Source that might show the original source of how a lead found your website, but still useful in many contexts.
Self-Reported
Most organizations find it useful to ask prospects “Where did you hear about us?”, either in a form or on the phone. Phone conversations typically produce better data, as rapport can be established and follow up questions asked if necessary.
Our recommendation is to track “Where did you hear about us?” in a separate custom field in Salesforce, to differentiate it from Lead Source or other fields that might be populated via website tracking technologies. Self-reported data from prospects can be useful, especially in gauging mindshare from consumers or the various ways they become aware of your business.
However, this data often will not agree with what web analytics show, and may have a tendency to give more credit to popular services that people commonly use and think about (eg. Google).
Third Party Tracking Apps
Because self-reported data can be unreliable, with a tendency to overweight media that consumers have a lot of exposure to (Google searches, retargeting ads, billboards), it is important to consider self-reported data alongside website tracking data.
There are a number of technologies for Salesforce that can capture precise website lead paths — how a visitor arrived at your website, which keywords they searched for, and what advertising campaign they responded to.
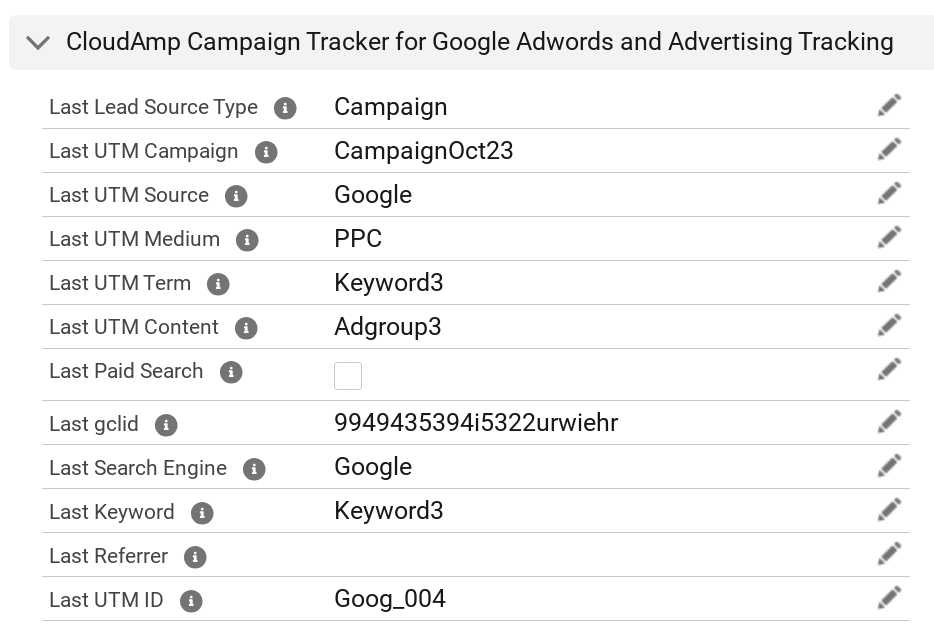
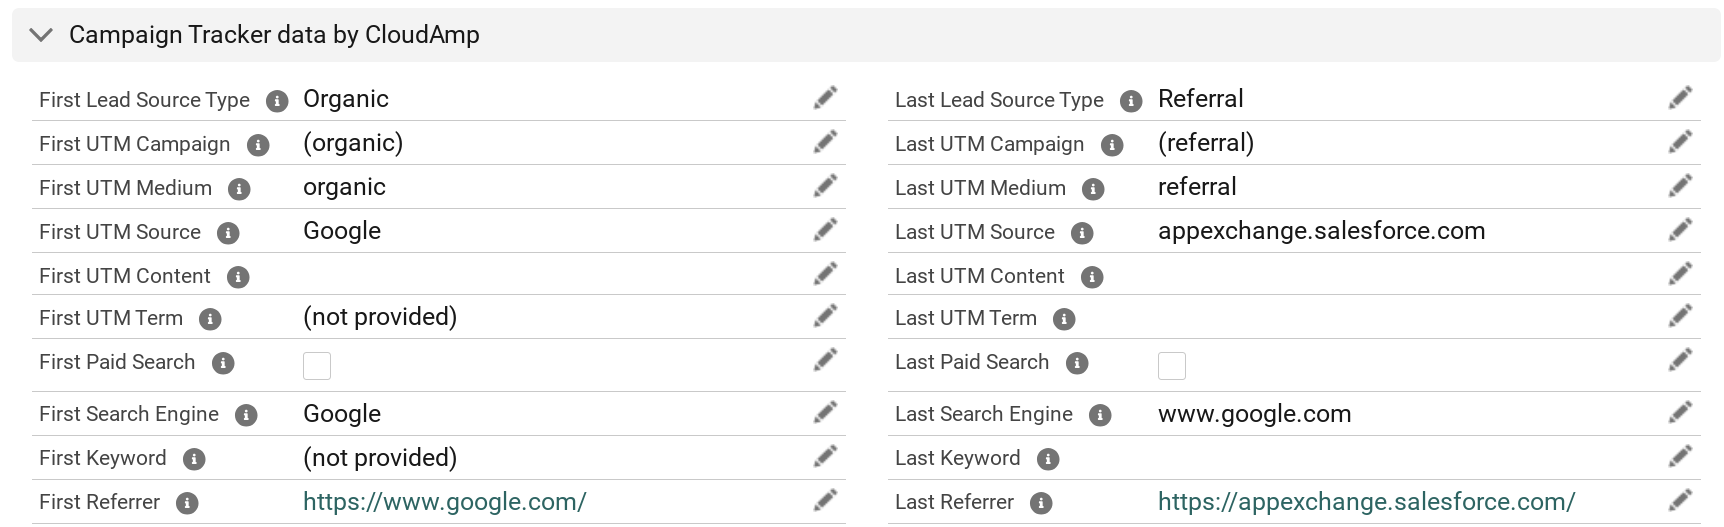
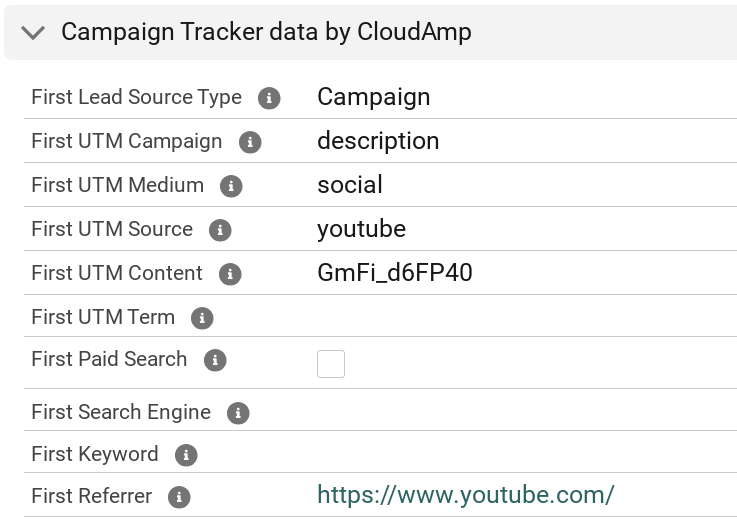
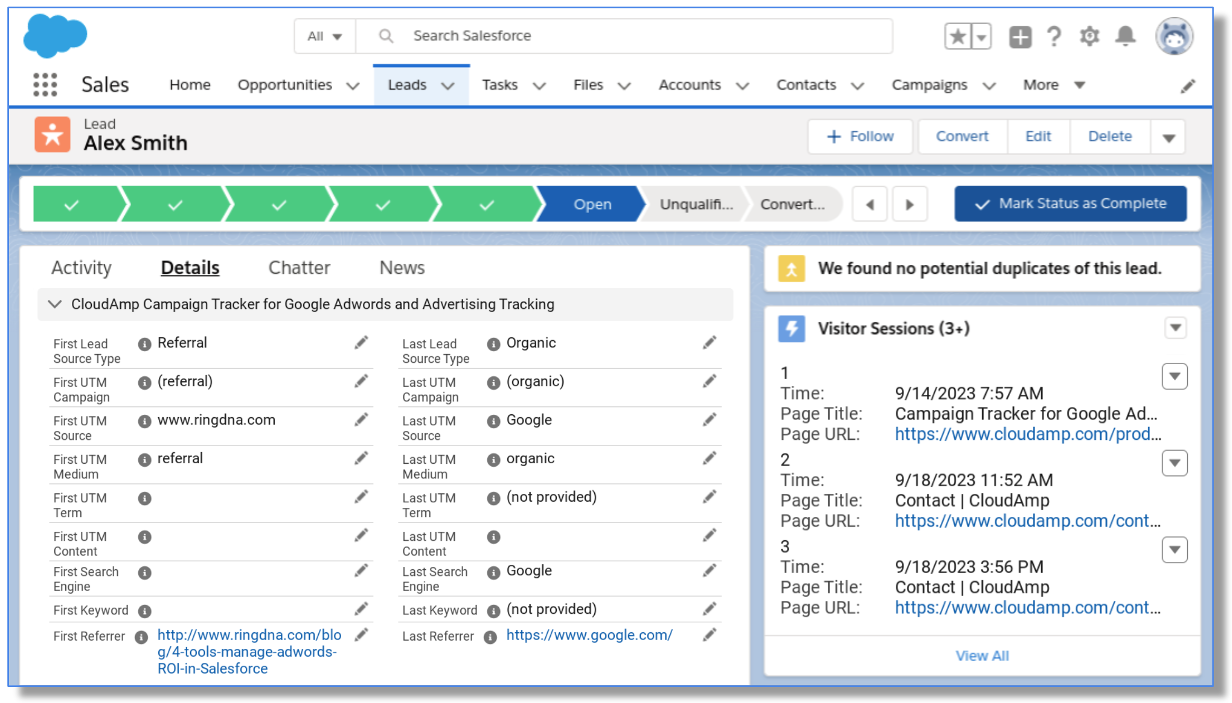
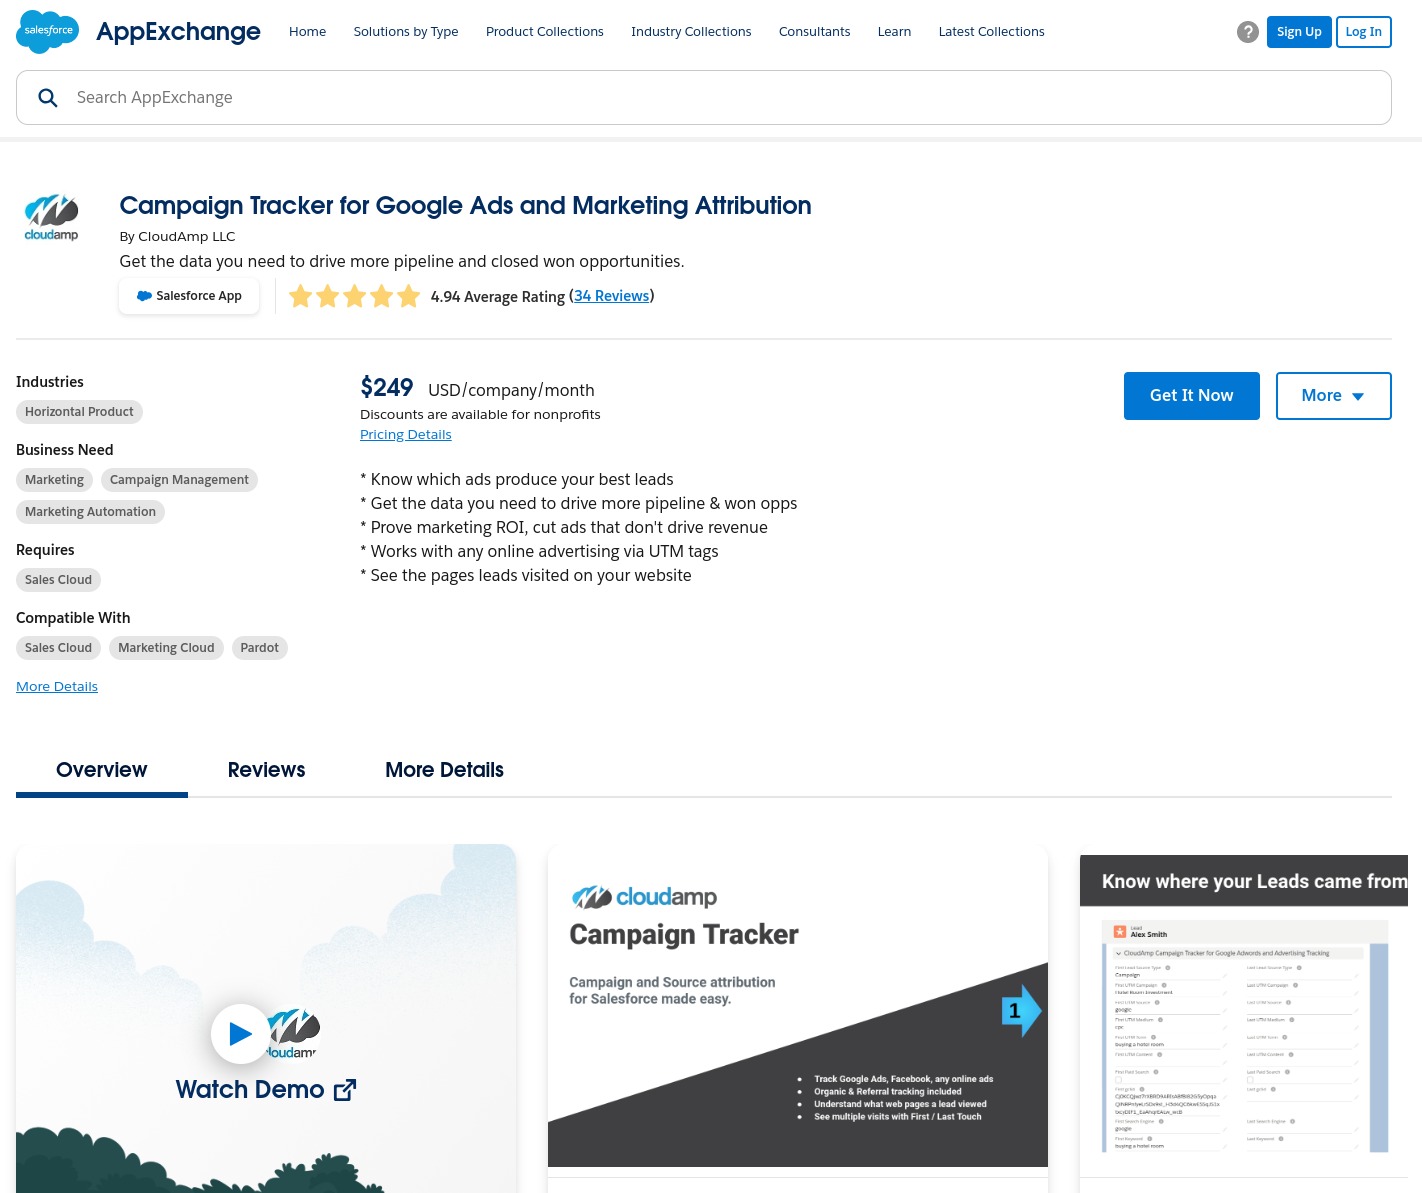
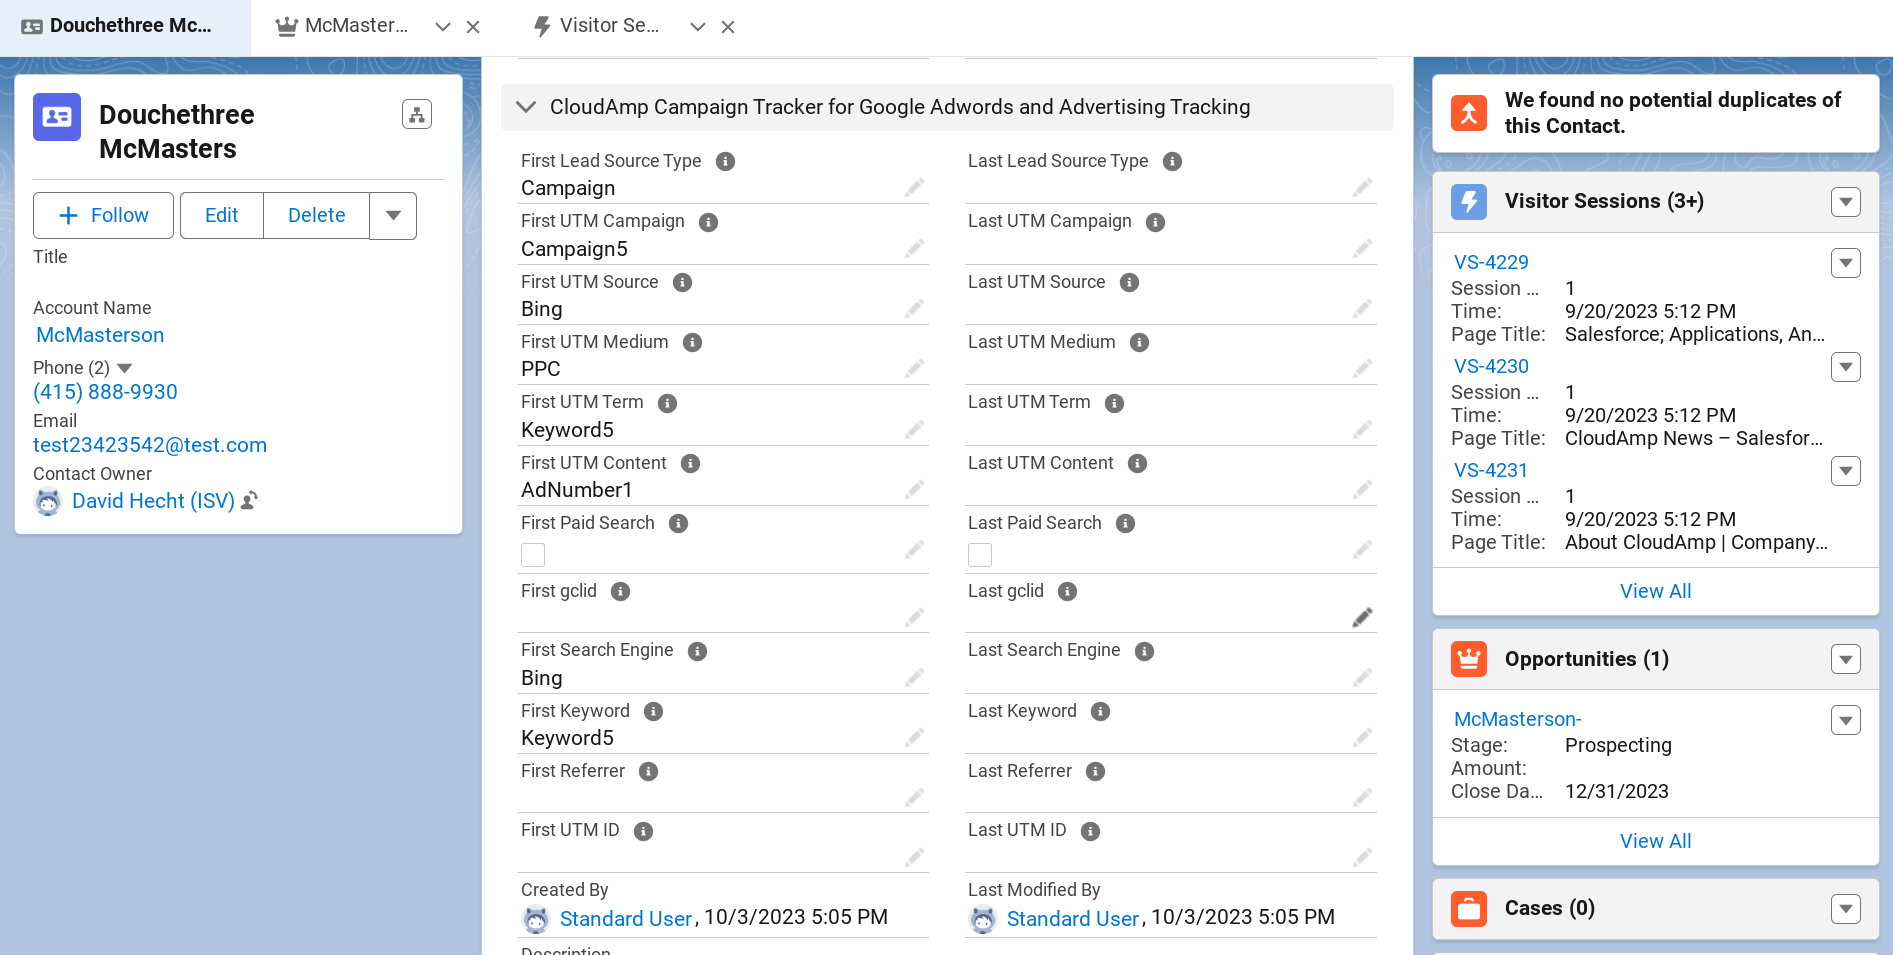
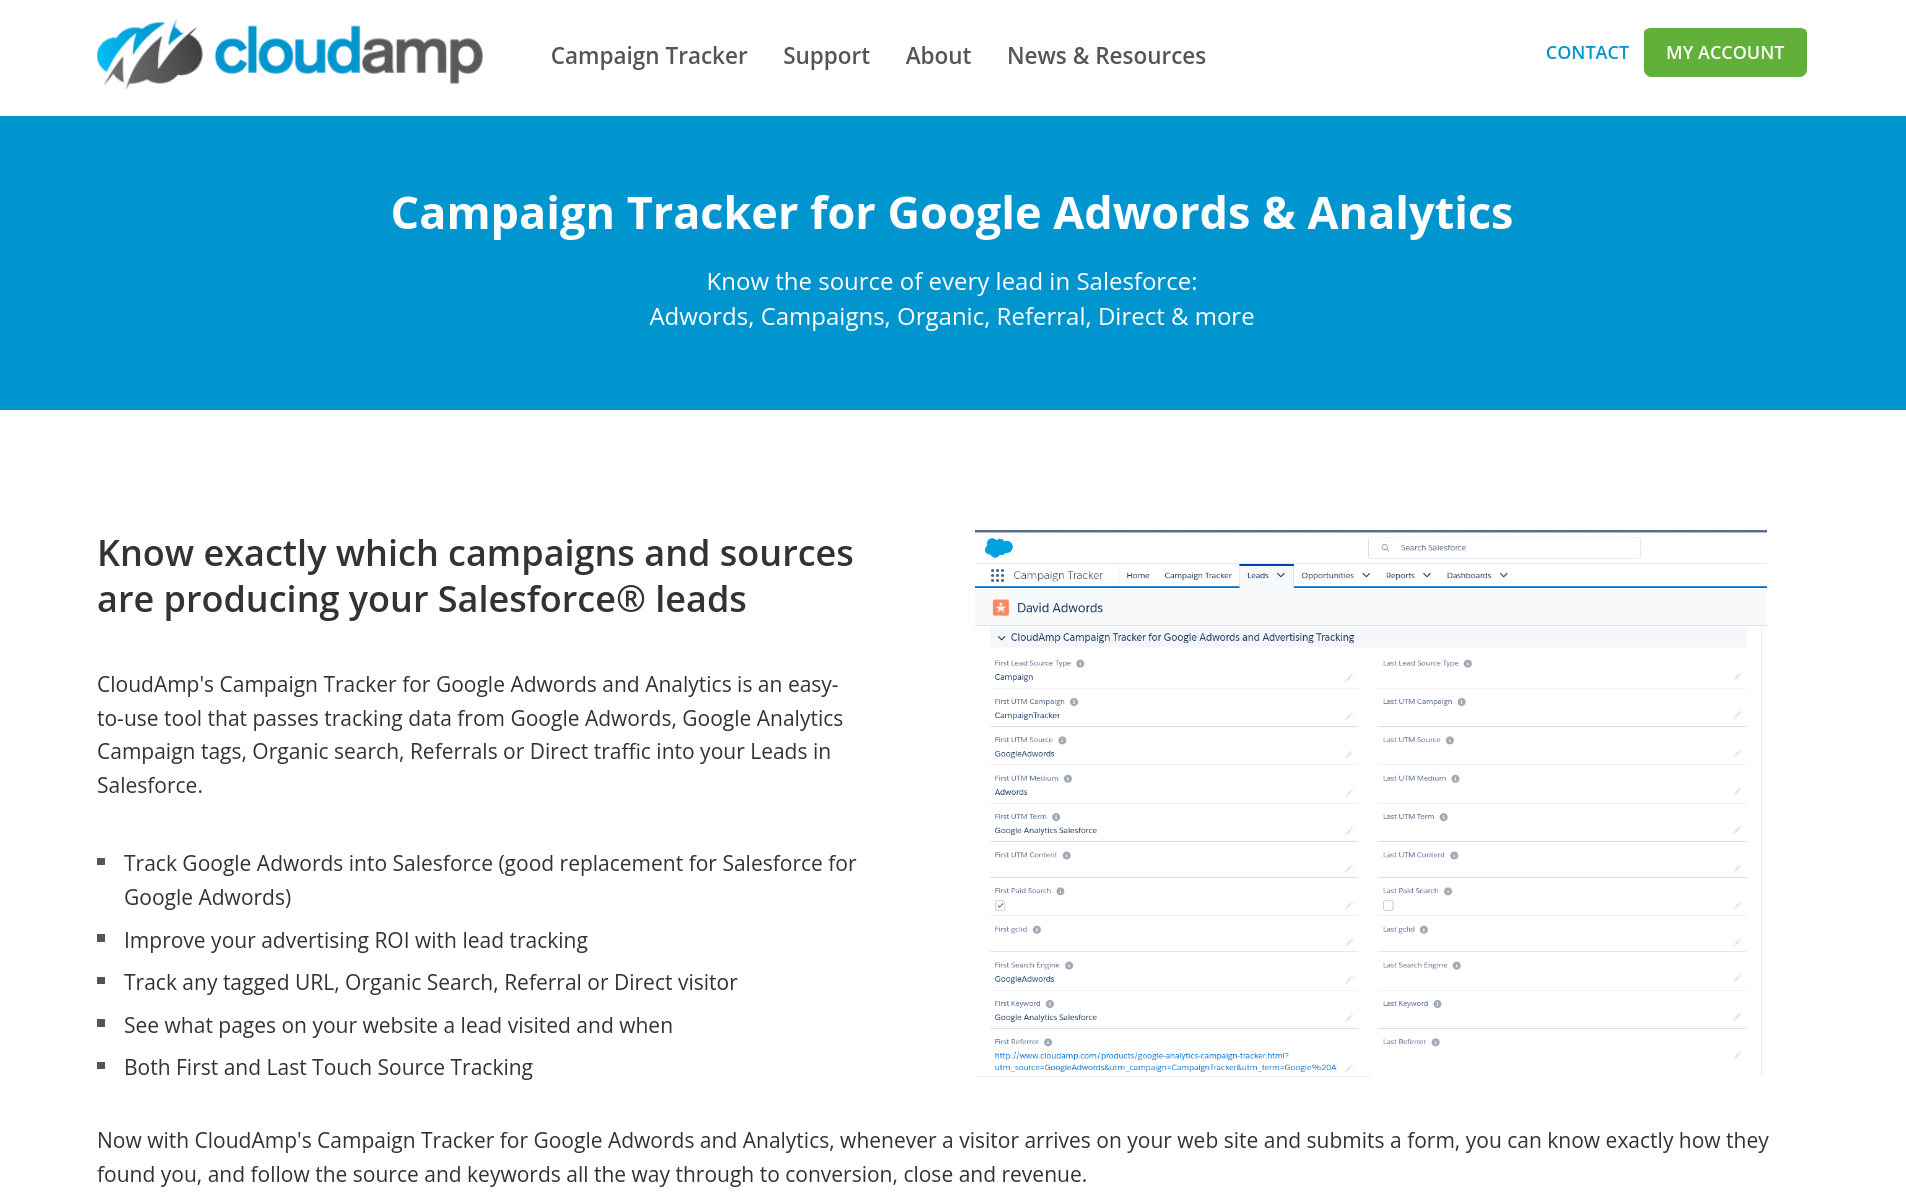
Salesforce’s Marketing Cloud Account Engagement (formerly known as Pardot) is a large platform that can provide you with a lot of enhanced data about your prospects. But there are also a number of lower cost, quicker to implement third party apps available, such as our CloudAmp Campaign Tracker.
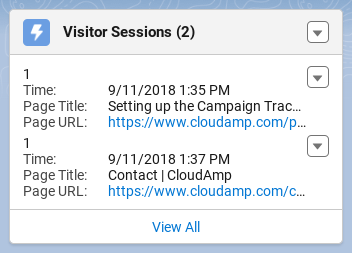
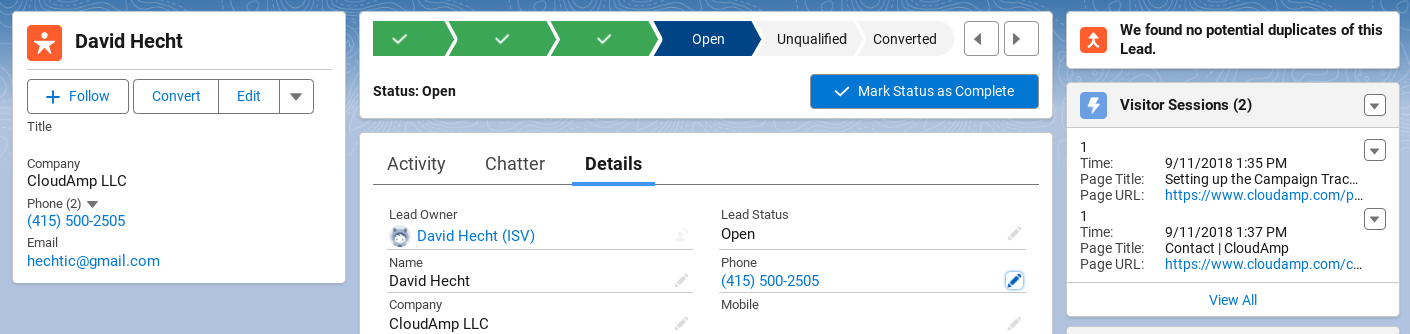
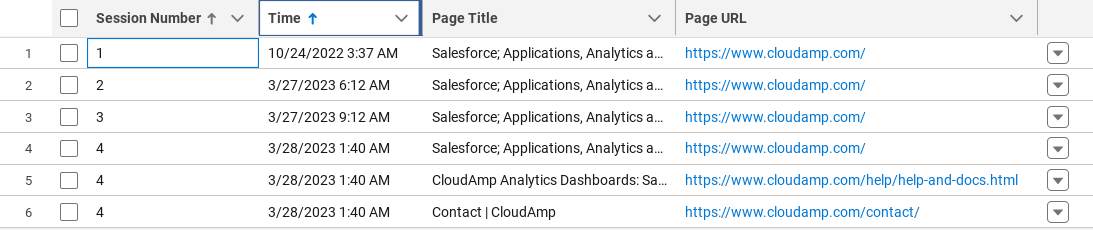
Using an app like the Campaign Tracker, you can capture all of the information about how your leads found you, straight into Salesforce. Know which sources, campaigns, and marketing content drove each particular lead, as well as keywords from paid search advertising.
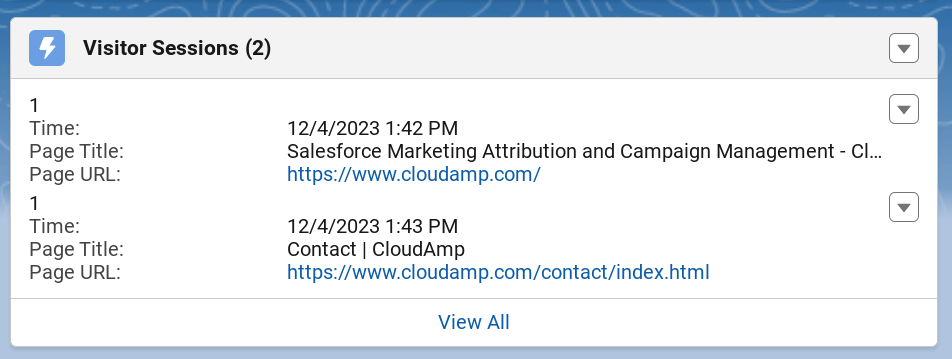
In addition, you can see which pages on your website a lead visited prior to submitting your web form. For many businesses, this information can be useful to understand buyer intent or product interest.

Data Enrichment Services
There are a number of services for Salesforce that can help fill in missing information on your leads, for better lead scoring and routing. This gives you more complete data, allows your web-to-lead forms to be shorter in many cases, and saves your team the time and effort of manually doing the research and updating Salesforce.
Services like Zoominfo and Clearbit can automatically append data to your leads, filling in blank fields such as industry, location, revenue, job title, social media handles and more.
Next Steps for Managing Salesforce Leads
Now you know how to create Salesforce web-to-lead forms and customize the data collected to suit the needs of your business.
Up next, you might be interested in one of our related articles, How to get a detailed Email about every new lead in Salesforce or Which Form or Web Page did a Salesforce lead come from?
There is a lot to cover in terms of how to manage leads in Salesforce, from lead assignment to scoring and different processes for qualifying and converting Salesforce leads. Stay tuned for our next installment of this series coming soon, The Ultimate Guide to Salesforce Lead Management. We hope to see you then!