
Published May 8, 2013 by David Hecht
Many online marketers and demand generation professionals want to track their leads in Salesforce, and understand the performance and ROI of their efforts in as near real-time as possible. This post is a step by step tutorial on how to receive a detailed email with all of the lead contact information and tracking details, each time a lead is created in Salesforce via the Salesforce web-to-lead forms on your website.
Your Salesforce administrator (or marketing / sales manager with the appropriate permissions) can assign new leads manually. But if you use assignment rules to automatically assign Salesforce leads to a user or queue, you can specify an email template for the notification in the matching entry. This allows you to receive an immediate, custom email with any information you want, every time a lead from your web site is created in Salesforce.
You may have done this already, as it can be annoying if you get a high volume of inquiries and get the standard notification email (above), which provides very little information.

If you don’t already have a Queue set up in Salesforce, I like to create one called “Inbound Web Leads” where everyone or selected people in marketing and sales can be members of the queue so they receive the notification emails.
Queues in Salesforce help teams manage leads, cases and more because records are placed in a queue, instead of being owned by a particular user. And the records remain there until they are assigned to a user or Accepted by a queue member. Any member of that queue or users above them in the role hierarchy can claim ownership of records in a queue.

You don’t technically need to create a queue, you can just assign all the leads to a single user with the same assignment rules we will use below. But a queue will give you far more flexibility now and allow you to easily scale for future growth as well.
There is a standard email template called “Leads: New assignment notification (SAMPLE)” that comes with Salesforce and is usually stored in the “Unfiled Public Email Templates” folder. For CloudAmp’s Campaign Tracker application, designed to track lead sources into Salesforce, we created a custom email template and included it in our app
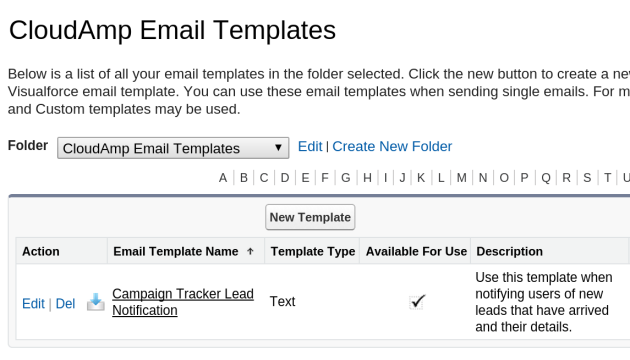
This custom email template, located in the “CloudAmp Email Templates” folder, has a large number of merge fields (the field names in { } brackets) which pull in contact data and all of the Campaign Tracker data into the email notification automatically. This way you can see right away when a new lead comes in how complete their contact information and tracking data is, without having to log into Salesforce.
You can of course clone and edit, or just edit this provided email template to reduce the number of fields in the email notification, or add in other fields from your Salesforce implementation that you think are important (custom fields or otherwise). In addition, if you are not using our Campaign Tracker application (why not?), you can create your own Email template and follow the rest of the instructions in the post.
![]()
Assignment rules automatically assign new web-generated leads that meet certain criteria. Without any lead assignment rules, Salesforce assigns all new web-generated leads to the Default Lead Owner defined on the Lead Settings page.
When you create or edit a lead manually, you can also check a box to assign the lead automatically using your active lead assignment rule, but that is a different process that we won’t cover here.
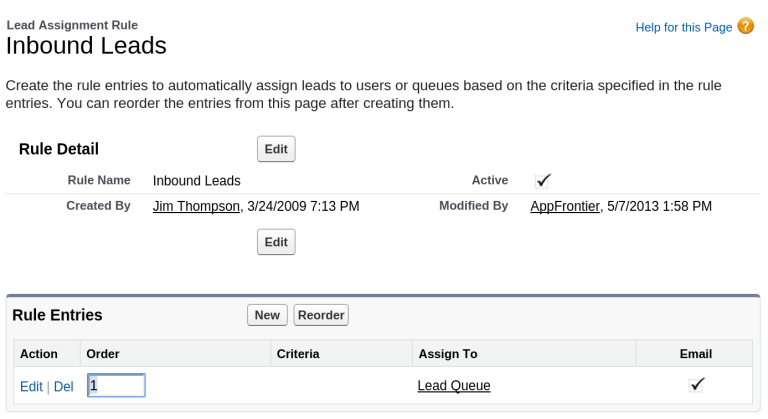
For each rule entry in an assignment rule that is evaluated, an email is automatically sent to the new owner if the rule causes the lead to be reassigned, and you specified an email template. This is where the magic happens, since you can have the assignment rule assign a lead to a queue, and all queue members will receive the email.

In the screenshot above, we have just created a single rule entry with blank values, so it should capture any web-generated leads. However, in most cases where different types of leads would need to go to different people, you can create multiple Rule Entries and order them so leads fitting various different criteria get assigned differently (and can have different Email notification templates too).
Assignment Rules (combined with Auto-Response Rules) are a great way of managing different types of leads, even leads from completely different web sites in a single Salesforce org. Just use a hidden field in your web-to-lead forms to set a custom value and you can trigger both lead assignment and email auto-responses that are customized with great granularity. But that is a post for another time.
There are other ways of triggering emails when the owner of a lead changes (such as Workflow rules if you have Salesforce Enterprise Edition or above), but this is the most common configuration.

So there you have it. Just follow these steps in Salesforce, and you will be receiving complete and instant Email notifications any time a new web-generated lead is created in Salesforce (just like the one above).
Any questions or feedback, please leave them in the comments below and I will respond. Thanks!

|
David Hecht Founder, CloudAmp |
| CloudAmp Apps for Salesforce |
Know where your best Salesforce leads come from, and track marketing ROI more easily.