Salesforce Lead Assignment to Campaigns Automated via CloudAmp  

How to Automatically Assign Salesforce Leads to Campaigns

Published March 25, 2025 by David Hecht

First published Sep 7, 2017, overhauled 2025


Assigning Leads to Salesforce campaigns is essential to measuring your marketing effectiveness, and comparing the response rates and ROI of your different channels and marketing efforts.


The Bad News

Like other messy data in Salesforce, duplicate leads and out of date opportunities, most of us use Campaigns inconsistently, or not at all.

(Not you, of course, you are amazing and your Salesforce processes are perfect 🙂)

When we forget to create Campaigns for every marketing effort, for example using Campaigns just for events (which is quite common), there is an incomplete picture of marketing effectiveness in Salesforce.

If you are using Pardot (Marketing Cloud Account Engagement) in addition to Salesforce, you have some automation options, but you also have some new challenges (sync anyone?)


Good News?

There are a number of tools which can automatically assign (and some even automatically create) Campaigns in Salesforce, to keep your Campaign data more organized and complete.

Read on for 5 options on how Salesforce Leads can be automatically assigned to Salesforce Campaigns, and the pros and cons of each.​


1 – Campaign Tracker

2 – Web-to-Lead Forms

3 – Data Import Wizard

4 – Add to Campaign Button

5 – Salesforce Flow

1 – Campaign Tracker

The CloudAmp Campaign Tracker app for Salesforce helps capture source, keyword and campaign information in your leads. New leads in Salesforce can be automatically assigned to up to 2 different Salesforce Campaigns, based on the First and Last touch utm_campaign values in each lead.


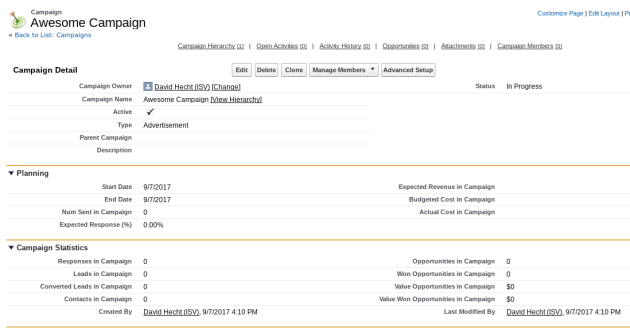
Just enter a utm_campaign value in a single field on each Salesforce Campaign you create, and if a new lead has a matching value in one of its CloudAmp utm_campaign fields, it will be auto-assigned to that Campaign. 

Automatic Salesforce Campaign Assignment based on UTM campaign values.


You can also have Campaigns automatically created, if a lead comes in where no Campaign exists that has a matching utm_campaign value (optional feature that can be toggled on or off).

CloudAmp "Allow Campaign Creation" checkbox setting to automatically create Salesforce Campaigns.

By making sure that Campaigns are automatically created based on new leads with utm_campaign values, you can more easily ensure a complete picture of your online marketing efforts is represented in Salesforce.


All you need to do is view the reports / dashboards to see which Salesforce Campaigns were auto-created by CloudAmp, and update their information as needed. Any leads coming in from that Campaign will already be members of that Campaign.

CloudAmp Scorecard

Pros

  • Easy to implement
  • Assigns new leads to up to 2 campaigns automatically
  • Auto-creates Campaigns (optional)
Cons

  • Requires app installed in Salesforce
  • To be fully automated, utm_campaign parameters are needed in your campaign URLs
  • Additional $249/month cost


2 – Web-to-Lead Forms 


Salesforce’s Web-to-Lead functionality is a great way to get leads directly into Salesforce. And Salesforce Campaigns provide useful data on what happened to the leads and contacts produced from various marketing activities.


Besides making sure inquiries don’t fall through the cracks by using web-to-lead functionality with Salesforce, any additional data you can add to your website forms can help your business. Source and keyword data can be added in through an app like our Campaign Tracker, and one easy addition is to hard-code a particular Salesforce Campaign value in your web-to-lead forms.


By including the ‘Campaign record ID‘ from Salesforce in a hidden form field, incoming Leads are automatically linked to the desired Campaign upon submission.

Identifying the Salesforce Campaign ID in a URL

This is mainly useful if you have many landing pages that are specific to certain advertising campaigns, but you can do it with your standard “Contact Us” form. Here’s how:


  1. Create a Campaign in Salesforce (or go to an existing Campaign) and copy the ID from the URL
  2. Add the following hidden field to your web-to-lead forms, replacing the value with the ID you just copied.


<input type="hidden" name="Campaign_ID" value="701Hu000002VAdkIAG">


These instructions assume you are using the HTML Salesforce provides in its Web-to-Lead form builder, but it should work (with some modifications) on any form that posts leads into Salesforce.


For more information, see the Campaign ID section in our guide Which Form or Web Page did a Salesforce lead come from?

Web-to-Lead Scorecard

Pros

  • Easy to implement
  • Can be added to most forms
  • No additional cost
Cons

  • Each campaign needs its own form and web page
  • Miscategorization possible (if visitors from other campaigns find the page)
  • Lack of flexibility


3 – Data Import Wizard


When importing Leads or Contacts into Salesforce using the Data Import Wizard, you can specify a Campaign to associate the imported records with. This allows for bulk addition of records to a Campaign during the import process. 

While this is not technically an automated process, it does update records in bulk, and is how most marketing people using Salesforce add leads and contacts to Campaigns today.


To use the Salesforce Data Import Wizard to add Leads or Contacts to a Campaign:


  1. Prepare a CSV file for import, either from a template you create or a Salesforce Report you export (for existing records that you want to update with Campaign membership)
  2. Navigate to a Lead or Contact list view
  3. Click the “Import” button top right
  4. Go through the import wizard
    1. Choose the Lead object
    2. Choose whether to import new records, update existing, or both
    3. Select how to match records (Salesforce ID is best if you are updating existing)
    4. Check the box to “Assign leads to campaigns”
    5. Select your CSV file
    6. Check mapping to see if any fields mapped incorrectly or not mapped
    7. Import!
    8. Review any error messages (if matching via Email or Name, duplicate records will produce frequent error messages)

CSV file for Salesforce Data Import Wizard

If you develop a process and a CSV template, then the Data Import Wizard can be used effectively on a regular basis to keep Salesforce records up to date with their Salesforce Campaign membership.

Data Import Wizard Scorecard

Pros

  • Supports Contacts in addition to Leads
  • Update up to 50,000 records at a time
  • No additional cost
Cons

  • Not automated
  • CSV template with Campaign IDs and other fields required
  • Errors possible with data mapping or record matching during import


4 – Add to Campaign Button

Salesforce provides a way to add all the records in a Salesforce report or list view to a Campaign. 

Salesforce Add To Campaign button

While this is not technically an automated process again, it does give you the ability to add Leads or Contacts to a Salesforce Campaign in bulk. Simply click on the “Add to Campaign” button on a lead or contact report or list view, and complete your member status selections.


To use the Salesforce “Add to Campaign” action button to add Leads or Contacts to a Campaign:


  1. Create a report or list view of the data you wish to see
  2. Select the records you wish to add to the Campaign
  3. Click the “Add to Campaign” button
  4. Confirm your settings
    1. Campaign
    2. Member Status
    3. Update or Overwrite Member Status
  5. Submit

Salesforce Add to Campaign options

List views are how most of us view records in Salesforce, so this can be a useful place to add Campaign members from. With Salesforce reporting however there is even more flexibility. So adding Campaign members from a Salesforce report means you can do more complex filtering, including using related object fields.

Add to Campaign Button Scorecard

Pros

  • Supports Contacts in addition to Leads
  • Allows more advanced filtering
  • No additional cost
Cons

  • Not automated
  • Potential for errors when preparing the report filters
  • Need to manually select records


5 – Salesforce Flow 

Salesforce administrators with expertise using the Flow feature can create flows that will automatically assign Leads to certain Salesforce Campaigns when they meet specific criteria.

Salesforce Flow for assigning leads to campaigns.

While Salesforce Flow is a powerful tool for automation in Salesforce, it does require advanced Salesforce knowledge less experienced administrators may not have. Flows also need to be carefully tested to make sure that they do not interfere with other Salesforce automations or data.


Depending on your use case, Flow may be the best option, as they can handle the automation of many things in Salesforce, not just Campaign assignment. But for your initial implementation, as well as any future changes that need to be made, you will most likely be relying on IT or Salesforce consultants.

Salesforce Flow Scorecard

Pros

  • Allows advanced logic
  • Can automate additional actions after Campaign Assignment
  • No additional cost
Cons

  • Difficult to implement
  • Needs to be set up and tested by experienced Salesforce Administrator
  • Updates need to be made by Salesforce Administrator


Learn More About CloudAmp

If you want to have your leads automatically assigned to Salesforce Campaigns based on their source and campaign information, then check out the CloudAmp Campaign Tracker.

CloudAmp also provides hands-on setup and Salesforce assistance, included with our app subscription. And we are always happy to answer questions free of charge, so don’t hesitate to reach out.


Share this post

 
David Hecht, Founder of CloudAmp  

David Hecht

Founder, CloudAmp


    CloudAmp Apps for Salesforce